 |
 | | Color Count |
|
|
 | |  | |  | | | Two colors | Three colors | Four colors |
|
|
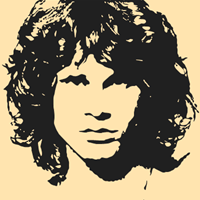
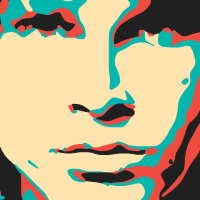
Use this option to change the number of colors in the vectorized image. If the number of colors is three or four, you are able to change the contrast in the image. If the number of colors is two, you are able to change the threshold value.
Min = 2, Max = 10, Default = 3.
|
|
|
| | Size (px) |
|
|
 | |  | | | Length = 8 | Length = 4 |
|
|
Use this option to change the length of a line segment. The length of a line segment is the distance between two points of a polygon. The larger the distance the lower the complexity of the polygon. If the distance is too large, the image will become disordered.
Min = 1, Max = 50, Default = 5.
|
|
|
| | Threshold |
|
|
 | | 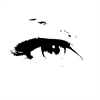 | | 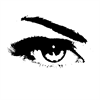 | | 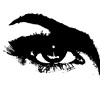 | | | Threshold = 64 | Threshold = 128 | Threshold = 192 |
|
|
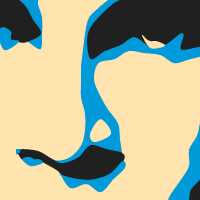
Use this option to change the threshold value. Pixels whose grayscale value is less than or equal to a certain threshold are set to the foreground color (or primary color). Pixels whose grayscale value is bigger than a certain threshold are set to background color (or secondary color).
Min = 0, Max = 255, Default = 128.
|
|
|
| | Contrast |
|
|
This option allows you to change the contrast of the image. This option is only available when the number of colors is three or four.
Min = 0, Max = 16, Default = 8.
|
|
|
 | | Curve |
|
|
| |  | | | Curve | Lines |
|
|
| This option allows you to draw a smooth line through the corner points of a polygon. When this option is unselected, the corner points of the polygon are connected by straight lines.
|
|
|
 | | Find Circles |
|
|
|
|
| This option allows you to detect circles in the image. The circles become separate layers in the layer stack.
|
|
|
| | Find Rectangles |
|
|
| This option allows you to detect rectangles in the image. The rectangles become separate layers (polygons) in the layer stack.
|
|
|
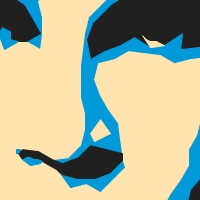
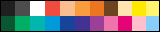
| | Pop Art Colors |
|
|
|
 |
|
|
| This option allows you to choose Pop Art colors. The color scheme is chosen from a set of twenty predefined colors often used in Pop Art. These colors are perfect for extravagant, eye-catching, poster-like designs.
|
|
|
| | Grayscale |
|
|
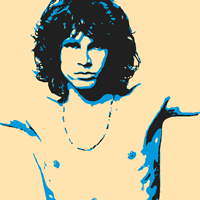 | | 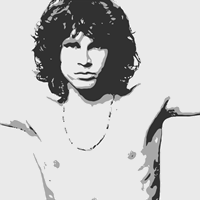 | | | Colors | Grayscale |
|
|
| This option allows you to convert the image into a grayscale image.
|
|
|
| | Transparent background |
|
|
|
|
| Use this option to choose a transparent background. This option is only available when the number of colors is two. A transparent background is often a good starting point for creating an image with a customized background. Create a copy of the background layer. This layer will now become the foreground layer. Apply the background effects to the original background layer.
|
|
|
| | Invert |
|
|
|
|
| This option allows you to swap the foreground and background color.
|
|
|
| OK + Export as Layers |
| This option allows you to apply the effect and create multiple layers, each of which can be manipulated without affecting any other part of the image. |
|
|
| Export as SVG |
| This option allows you to apply the effect and export the image in SVG format. Scalable Vector Graphics (SVG) is an XML-based vector image format for two-dimensional graphics with support for interactivity and animation. The SVG specification is an open standard developed by the World Wide Web Consortium (W3C). |
|